Power Platform admin center > Environments > [select an environment] > Settings > Features > Advanced find options > switch Modern advanced find in model-driven apps setting from On to Off
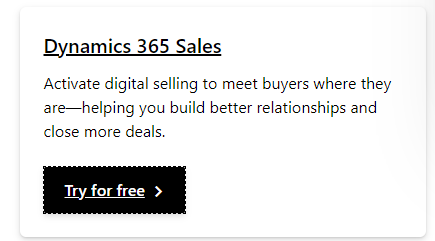
Knowing how to create a Microsoft Dynamics 365 Trial environment is imperative for evaluating Dynamics 365 offerings (Sales / Service / Marketing / etc.). Given the numerous new major features released biannually (Release Waves) – last thing we want to do is “dirty” our Dynamics 365 production environments by enabling new features or previews for our evaluation or planning purpose. Dynamics Sandbox environment is another good option for trying out new features – however it may not be as “detached” and “clean” as a fully separated trial environment.
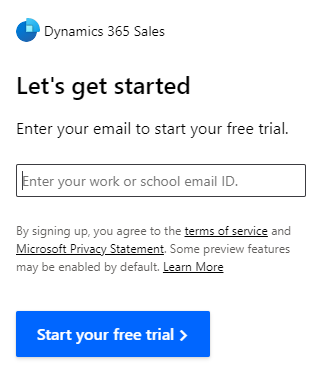
I usually start with a Microsoft Dynamics 365 Online Free Trial environment for trying out new features to minimize any impact to my current production/sandbox environments. It is free for 30 days without needing any credit card info. It also offer the option to extend the trial end date for another 30 days free (extension however does requires a credit card for validation purpose).
Another good idea to create a free Dynamics 365 Trial environment is for trouble-shooting / comparing and contrasting an existing production feature behavior – the Trial environment with the latest default out of the box vanilla setting could help isolate possible behavior differences due to settings or other environment variables.
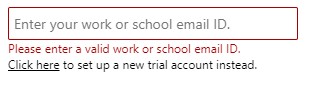
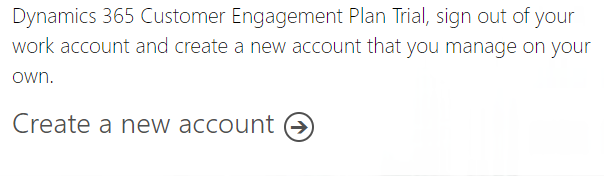
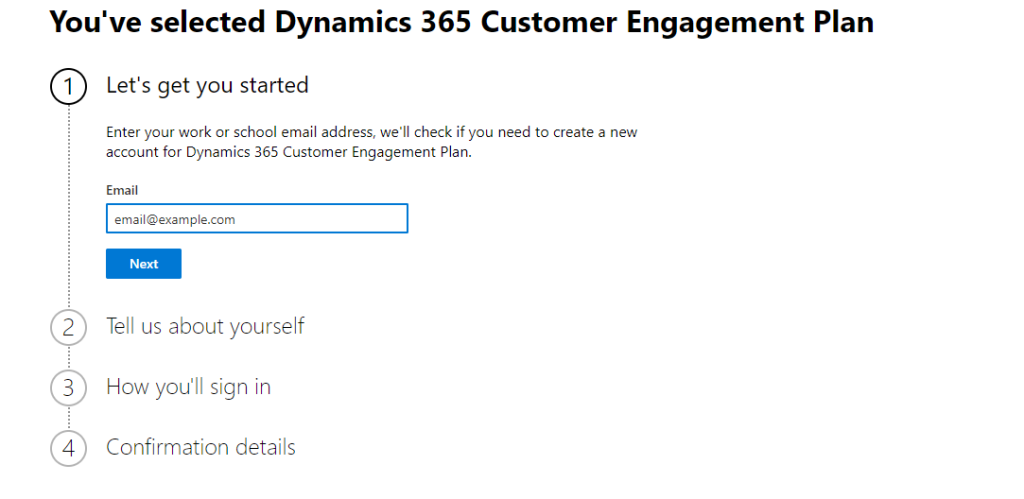
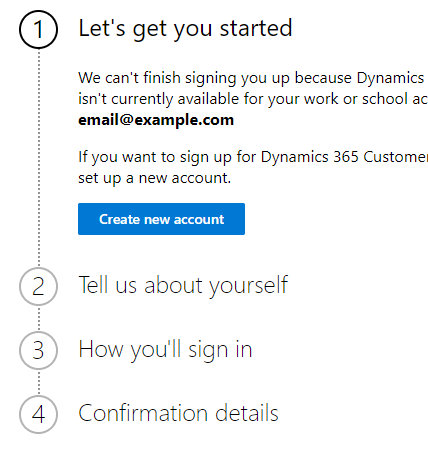
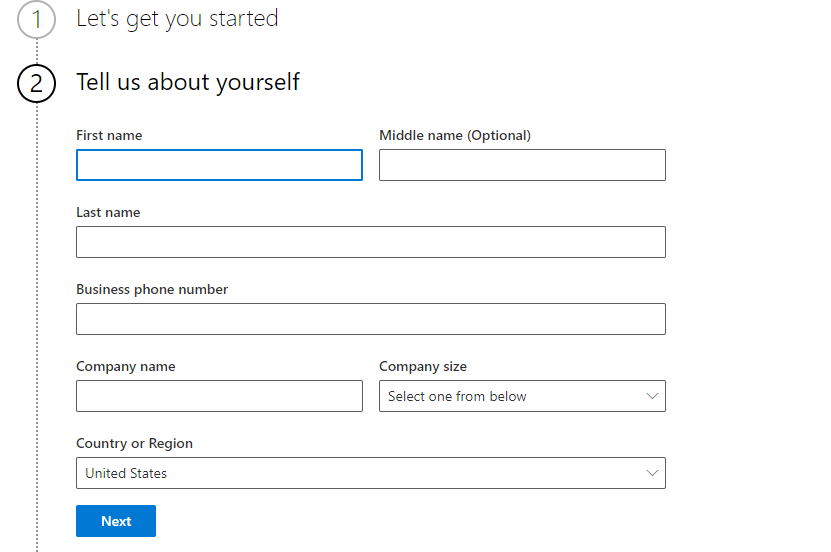
Microsoft Dynamics 365 Online Trial creation and setup steps change often. The latest approach that I prefer is to first setup a free online Microsoft Office 365 E3 Trial and then setup the Microsoft Dynamics 365 Sales Premium Trial.
Microsoft Dynamics 365 allows a table column (field) type that supports selection of multiple option values (choices). This is a very good field format type to setup vs creating custom “one to many” or “many to many” table for storing multiple values associated with a record. An example would be an Account record with the various types of wine it carries such as Cabernet Sauvignon, Pinot Noir, Merlot, etc. (I’m working in the luxury brand winery CRM these days so this example readily comes to mind…)
At present, Multi-Select Choices field is not supported via Business Rules or legacy Workflows (The good news is that Power Automate Flows could access and update multi-selection picklist option sets in async mode). So if we need some custom logic via the Front End User Interface – what should we do?
Below is a simple JavaScript example of accessing and copying a Multi-Select Choices field value to another Choices field:
Here are the steps to setup the example:
// jsCRM220501.copyChoices01
var jsCRM220501 = window.jsCRM220501 || {};
(function () {
  "use strict";
  this.copyChoices01 = function (executionContext) {
    var formContext = executionContext.getFormContext();
    var mpl001Values = formContext.getAttribute("new_choices001").getValue();
    formContext.getAttribute("new_choices002").setValue(mpl001Values)
  }
}).call(jsCRM220501);
Setup two MultiSelect Option Set (Choices) fields on the Account form. Name these two MultiSelect Option Set fields “Choices001” and “Choices002” so that it matches the sample code field name references above. Otherwise be sure to match the field names by updating the “new_choices001” and “new_choices002” appropriately.
Setup a JavaScript Web Resource (it is better to use the Classic Solution Designer for this at this time)
Click on the Text Editor button on the left of the Type field and insert the JavaScript code above
Save and Publish this Web Resource
Set the Account Form Onload Event to call this Web Resource (Onload Event is use for this example – could be setup for other events such as field update or record save event)
Save the Form and Publish the Form. That’s it for this simple Multi Choices JavaScript copy example.
Here is a Multi Choices JavaScript example to show a hidden form field if one of the multi selected option set value is 10000001:
var jsCRM220501 = window.jsCRM220501 || {};
(function () {
  "use strict";
  this.displayField = function (executionContext, fieldname) {
    var formContext = executionContext.getFormContext();
    var mpl001Values = formContext.getAttribute("new_choices001").getValue();
    if (mpl001Values) {
      // check if one of the value selected is 100000001
      if (mpl001Values.includes(100000001)) {
        // hide the new_textfield001 field on crm form if 100000001 is selected
        formContext.getControl("new_textfield001").setVisible(true);
      }
    }
  }
}).call(jsCRM220501);
Here is a Multi Values JavaScript example to remove a selected (de-select) value 10000002:
// jsCRM220501.copyChoices01
var jsCRM220501 = window.jsCRM220501 || {};
(function () {
  "use strict";
  this.copyChoices01 = function (executionContext) {
    var formContext = executionContext.getFormContext();
    var mpl001Values = formContext.getAttribute("new_choices001").getValue();
    // deselect value 100000002 before copy to another multi-select picklist
    mpl001Values = mpl001Values.filter(function(e) { return e !== 100000002 })
    formContext.getAttribute("new_choices002").setValue(mpl001Values)
  }
}).call(jsCRM220501);
Contact me if you need some Microsoft Dynamics 365 / Power Apps / CRM Sales Customer Engagement assistance.
Frank Lee 12 times awarded Microsoft MVP – Dynamics 365 / CRM San Francisco Bay Area | Silicon Valley
Per the Microsoft Power Apps Share an embedded canvas app article – need to share the embedded canvas app with Everyone in your organization, a security group and/or specific users.
Here is an example screen shot showing sharing the app with Everyone, a Microsoft 365 security group, and a specific user. Note: If sharing with Everyone – then NO need to share with specific users.
Ensure the users have appropriate permissions for any Microsoft Dataverse tables (entities) that the embedded canvas app uses – this means checking the usual Dynamics 365 / Power Apps Security Roles and assigning them properly. In-addition, ensure at least one of the assigned Dynamics 365 / Power Apps Security Role has read permissions (full green circle) for the “Canvas App” table under the “Customization” tab and the “CanvasApp Extended Metadata” table under the “Custom Entities” tab
Contact me if you need some Microsoft Dynamics 365 / Power Apps / CRM Sales Customer Engagement assistance.
Frank Lee 12 times awarded Microsoft MVP – Dynamics 365 / CRM San Francisco Bay Area | Silicon Valley
The Power Apps Embed a canvas app on a model-driven form capability can offer some wonderful mash up design options (best of Model Driven and Canvas App together). However – one of the current limitation is that it only works on the Dynamics 365 Web Client as noted in this limitation article.
The canvas app custom control is only supported for use with the Web client type. Currently, the Phone and Tablet client types aren’t supported.
So what happens if you enabled the Embed Canvas app control on the Phone or Tablet Client?
Error – this is what happens when we enabled Show component on Mobile and Tablet:
Power Apps is unable to complete sign in. Please make sure third party cookies are allowed in your browser settings. We tried adjusting the various iPhone’s Safari settings – no luck.
This app isn’t working. Refresh your browser or try again later.
All the above Microsoft Dynamics 365 Mobile Apps have the same embed canvas issue. So if you are looking for a customization option that supports Dynamics 365 mobile – will have to wait for embed canvas support on mobile client. Or build the mobile app entirely via stand-alone Power Apps Canvas!
So based on the current support of Web Client only – I would update the following form settings to only work on the Web Client:
Show component on Web only
Hide on phone
In summary, if the functionality is only needed on the Dynamics 365 Web Client, good examples would be for call center customer service or inside sales representatives – then definitely consider the embed canvas within model driven form for design options.
Contact me if you need some Microsoft Dynamics 365 / Power Apps / CRM Sales Customer Engagement assistance.
Frank Lee 12 times awarded Microsoft MVP – Dynamics 365 / CRM San Francisco Bay Area | Silicon Valley
Note from Power App Mobile: Customer engagement apps (such as Dynamics 365 Sales and Dynamics 365 Customer Service) don’t run in Power Apps mobile. Instead, you use the Dynamics 365 for phones and tablets apps.
However – it should work OK per this Microsoft Documentation. It just launches the Dynamics 365 for phones and tablets App with a few minor differences that I’d observed – icons on the main apps list are different and non-production apps selection. Power Apps mobile allows users to pin the Microsoft CRM App on to their phone’s home screen
To set the “Show non-productionapps” in Power App Mobile: need to go to Settings. This is important to note if you are running a Dynamics 365 Trial Environment – since Trial Environments are considered non-production apps.
“Show non-production apps” is not enabled by default – when you initially open Power Apps Mobile you may see “You currently have no apps” under the “All apps” view.
There is actually a fourth Dynamics 365 Mobile app choice – the Microsoft Outlook for iOS and Androidwith Dynamics 365 Add-in. It is currently the only mobile choice to track an email from the Outlook inbox to Dynamics 365 and have access to Dynamics 365 data. This is the SAME Dynamics 365 App for Outlook setup used on the Microsoft Outlook on the desktop and web – just on the mobile. There are some features not supported on the mobile for Android or iOS vs desktop/web as documented here such as tracking Outlook meeting appointments.
Between the Dynamics 365 for phones and Dynamics 365 Sales app – the Dynamics 365 Sales app is newer, optimize for Salespeople and has Exchange Online calendar appointment integration – so start with the Dynamics 365 Sales app and test if it is sufficient for your company. Per Microsoft Dynamics 365 Sales mobile app Overview: It is recommended for all Dynamics 365 Sales users who are using the Dynamics 365 for phones and tablets app to migrate and start using the Dynamics 365 Sales app instead. Here is a link to the difference between Dynamics 365 Sales app and Dynamics 365 for phones and tablets app
Now, if your organization is using Power Apps mobile, both canvas and model driven apps – then start with Power Apps mobile and go from there.
By the way, your CRM users don’t have to be limited to one Dynamics 365 Mobile App. Maybe deploy two Dynamics 365 Mobile Apps if that makes sense. For me personally – I’d start with the Outlook Mobile App with Dynamics 365 Add-in AND Dynamics 365 Sales mobile app. This way, I get to track/set regarding my Outlook/Exchange Emails and also my Appointments.
As always, with any Microsoft Dynamics CRM deployment – proper planning, setup, testing, user readiness and support are keys to success.
Contact me if you need some Microsoft Dynamics 365 CRM Sales Customer Engagement assistance.
Frank Lee 12 times awarded Microsoft MVP – Dynamics 365 / CRM San Francisco Bay Area | Silicon Valley
This process does take multiple steps and it is important not to get them mixed up nor skip a few steps. However, when mastered, creating standardized documents will be much easier using templates!
There will be a video tutorial at the bottom of this post.
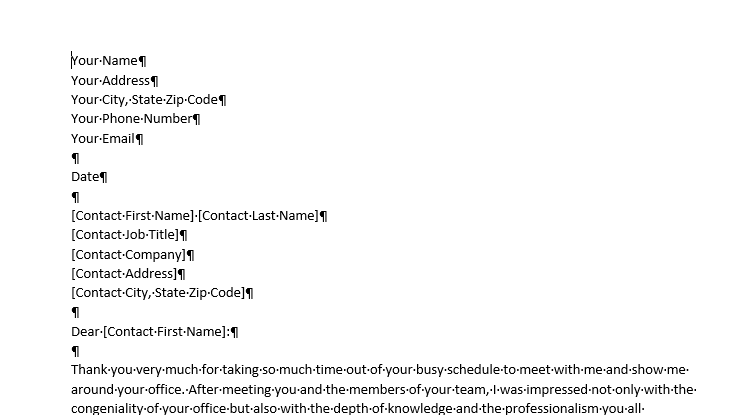
1: Have/Create a word template
For this demo, I will use this Interview Thank You template already prepared prior to this process.
Next, you need actual information to put into those areas (name, address, number, etc.) Let’s use some sample contacts for this demo.
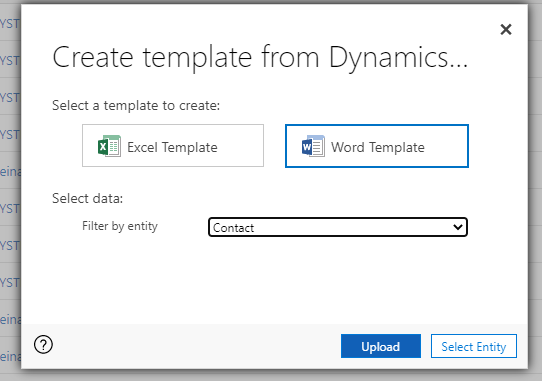
1. go to Settings in Dynamics 365 >> Advanced Settings >> click the dropdown next to Settings >> under Business click on Templates >> Document Templates >> + NEW >> select Word Template >> choose Contact (or whatever entity for the template) >> Select Entity
2. You’ll be asked to select certain items pertaining to the relationships. If you have other…
This is to edit the left hand side menu by removing a certain item that isn’t needed within the Dynamics 365 app. For the steps, I will show it through the Sales Hub and will be removing “Quick Campaigns” from the Marketing section.
There will be a video tutorial at the bottom of this post.
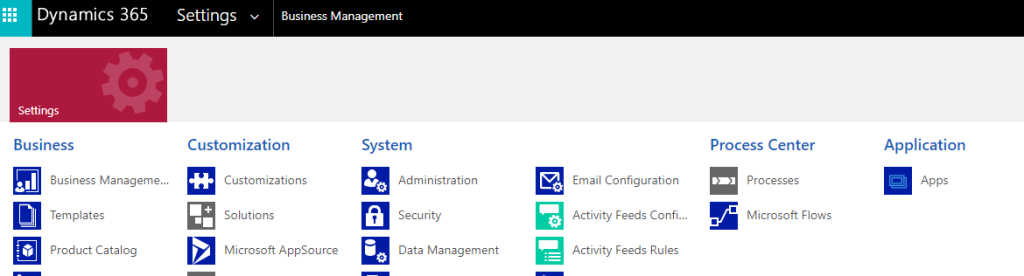
On whatever Dynamics 365 app you’re on, click on the settings icon on the top right and select Advanced Settings
2. Click on the drop down next to “Settings”, select Apps
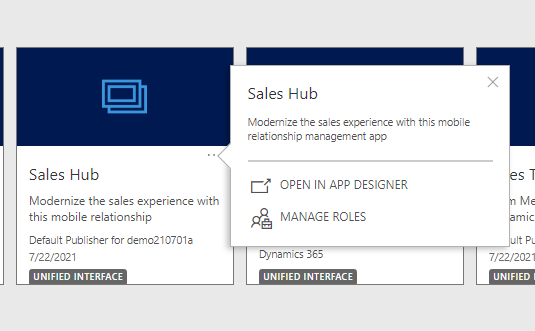
3. It will bring you to a page that includes all of your apps. Select the app for which menu you need to edit. Click the three dots and select Open in App Designer
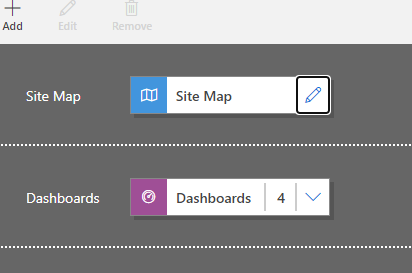
4. Click on the edit “pencil” button next to Site Map.
5. Select the certain item to remove, then click the Delete button on the top left.
Encountered the following error when trying to delete a Microsoft Dynamics 365 Business Process Flow (BPF)
Cannot Delete Component. Cannot delete Process because one or more components require it. More information on the dependencies can be found here: Details
Clicking on the Details opens up the Dependent Components Detected windows. BUT it is empty.
Download Log File – does not specify the details either.
System.ServiceModel.FaultException`1[Microsoft.Xrm.Sdk.OrganizationServiceFault]: System.Web.HttpUnhandledException: Exception of type 'System.Web.HttpUnhandledException' was thrown. ---> Microsoft.Crm.CrmException: The Entity(15c84b70-23cf-eb11-bacc-000d3a57368e) component cannot be deleted because it is referenced by 2 other components. For a list of referenced components, use the RetrieveDependenciesForDeleteRequest.
   at Microsoft.Crm.Dialogs.DeleteDialogPage.ProcessCrmException(CrmException crmEx) +0x169
   at Microsoft.Crm.Dialogs.DeleteDialogPage.ConfigureForm() +0x907
   at Microsoft.Crm.Application.Controls.AppUIPage.OnPreRender(EventArgs e) +0x75
   at Microsoft.Crm.Application.Controls.AppPage.OnPreRender(EventArgs e) +0x7
   at System.Web.UI.Control.PreRenderRecursiveInternal() +0x54
   at System.Web.UI.Page.ProcessRequestMain(Boolean includeStagesBeforeAsyncPoint, Boolean includeStagesAfterAsyncPoint) +0x6d3
   --- End of inner exception stack trace ---
   at System.Web.UI.Page.HandleError(Exception e) +0x11b
   at System.Web.UI.Page.ProcessRequestMain(Boolean inc... (Fault Detail is equal to Exception details:
ErrorCode: 0x80040216
Message: System.Web.HttpUnhandledException: Exception of type 'System.Web.HttpUnhandledException' was thrown. ---> Microsoft.Crm.CrmException: The Entity(15c84b70-23cf-eb11-bacc-000d3a57368e) component cannot be deleted because it is referenced by 2 other components. For a list of referenced components, use the RetrieveDependenciesForDeleteRequest.
   at Microsoft.Crm.Dialogs.DeleteDialogPage.ProcessCrmException(CrmException crmEx) +0x169
   at Microsoft.Crm.Dialogs.DeleteDialogPage.ConfigureForm() +0x907
   at Microsoft.Crm.Application.Controls.AppUIPage.OnPreRender(EventArgs e) +0x75
   at Microsoft.Crm.Application.Controls.AppPage.OnPreRender(EventArgs e) +0x7
   at System.Web.UI.Control.PreRenderRecursiveInternal() +0x54
   at System.Web.UI.Page.ProcessRequestMain(Boolean includeStagesBeforeAsyncPoint, Boolean includeStagesAfterAsyncPoint) +0x6d3
   --- End of inner exception stack trace ---
   at System.Web.UI.Page.HandleError(Exception e) +0x11b
  ...).
Each Business Process Flow creates a corresponding table (called entity previously). This table could be referenced as a dependent component. Open this table that was created when a new BPF is activated the first time – click on the BPF Name (this is the table that was created)
Click on “Show Dependencies”
Noticed that this table was reference in a Model driven app. Note: OK to ignore the EntityRelatonship component types and the actual BPF.
For this example – click on the CRM Hub Model-driven app and remove the BPF entity from the app
Be sure to save and then publish. The BPF can now be deleted.
Contact me if you need some Microsoft Dynamics 365 CRM Sales Customer Engagement assistance.
Frank Lee 12 times awarded Microsoft MVP – Dynamics 365 / CRM San Francisco Bay Area | Silicon Valley